Functionality via custom.js
There is the possibility to use your own functions in Dashticz.
For this you can edit the file <dashticz folder>/custom/custom.js.
function afterGetDevices()
This predefined function will be called after every update of a Domoticz device.
You can enter code inside this function which you want to be called.
Of course, you can also use stuff like $(document).ready() etc…
The following example shows how you can change the styling of a Domoticz device based on the status:
function afterGetDevices(){
    if (Domoticz.getAllDevices()[120].Data == 'Off') {
            $('.block_120 .title').addClass('warningblue');
            $('.block_120 .state').addClass('warningblue');
    }
    else {
            $('.block_120 .title').removeClass('warningblue');
            $('.block_120 .state').removeClass('warningblue');
    }
}
In this example the CSS style ‘warningblue’ is applied to the title and state part of Domoticz block 120 if the state is ‘Off’ (as used by switches).
For this example to work you must also add the definition for warningblue to custom.css. For instance as follows:
.warningblue {
  color: blue !important;
}
function getExtendedBlockTypes(blocktypes)
Some blocktypes are filtered out by their distinct name and therefore will not produce the nice icons. Referring to blocktypes.Name = {} section in blocks.js.
Add the following function to show the icons and data-layout for blocks with your own names.
function getExtendedBlockTypes(blocktypes){
   blocktypes.Name['Maan op'] = { icon: 'fa-moon-o', title: '<Name>', value: '<Data>' }
   blocktypes.Name['Maan onder'] = { icon: 'fa-moon-o', title: '<Name>', value: '<Data>' }
   return blocktypes;
}
function getBlock_IDX(block)
Want your block to show up differently then Dashticz generates and do you have a little bit of coding skills?
Add to custom.js one of the examples:
function getBlock_233(block){            //change 233 to the idx of your device!
  var idx = block.idx;                   //the Dashticz id
  var device = block.device;             //The Domoticz device info
  var $mountPoint = block.$mountPoint    // The DOM entry point for this block

    $mountPoint.find('.mh')                               //Find the correct block
       .off('click')                                                         //remove any previous click handler
       .click(function() {                                        //install new click handler
          switchDevice(block, 'toggle', false);     //switch the device on click
       })
       .addClass('hover');                                             //and add the predefined hover css class

   var html='';
   html+='<div class="col-xs-4 col-icon">';
      if(device['Status']=='Off') html+=iconORimage(block,'fas fa-toggle-off','','off icon');
      else html+=iconORimage(block,'fas fa-toggle-on','','on icon');
   html+='</div>';
   html+='<div class="col-xs-8 col-data">';
   html+='<strong class="title">'+device['Name']+'</strong><br />';
   if(device['Status']=='Off') html+='<span class="state">AFWEZIG</span>';
   else html+='<span class="state">AANWEZIG</span>';

   if(showUpdateInformation(block)) html+='<br /><span class="lastupdate">'+moment(device['LastUpdate']).format(settings['timeformat'])+'</span>';
   html+='</div>';
   return html;
}
function getStatus_IDX(block)
This function is called when a Domoticz device is updated. You can use this function for instance to set specific block parameters depending on the value of the device.
Example, change the icon based on the device value (in this case device 413, the first subdevice):
function getStatus_413_1(block) {
     var usage = block.device.Usage;
     if (parseFloat(usage) > 0) {
         block.icon = 'fas fa-sun slow-spin'
     } else {
         block.icon = 'fas fa-sun';
     }
 }
Example, add a red background to a switch when energy usage reaches a limit:
function getStatus_145(block){
var idx = block.idx;
var device = block.device;
   if(parseFloat(device['Data'])>23){
      block.addClass='warning';
   }
   else {
      block.addClass='';
   }
}
And in custom.css add your css, according to this example:
.warning {
   background: rgba(199,44,44,0.3) !important;
    background-clip: padding-box;
}
Or if you like a blinking version:
.warning {
   background: rgba(199,44,44,0.3) !important;
   background-clip: padding-box;
   border: 7px solid rgba(255,255,255,0);
   -webkit-animation: BLINK-ANIMATION 1s infinite;
   -moz-animation: BLINK-ANIMATION 1s infinite;
   -o-animation: BLINK-ANIMATION 1s infinite;
   animation: BLINK-ANIMATION 1s infinite;
}

@-webkit-keyframes BLINK-ANIMATION {
   0%, 49% {
      background-color: rgba(199,44,44,0.3);
      background-clip: padding-box;
      border: 7px solid rgba(255,255,255,0);
   }
   50%, 100% {
      background-color: rgba(199,44,44,0.7);
      background-clip: padding-box;
      border: 7px solid rgba(255,255,255,0);
   }
}
Example, change the block background color to the setted light RGB color:
function getStatus_20(block){
        var color = JSON.parse(block.device.Color);
        if (block.device.Data!='Off') {
                var colorStr = `rgb(${color.r},${color.g},${color.b})`;
                $(block.mountPoint + ' > div').css('background-color', colorStr)
        }
        else
                $(block.mountPoint + ' > div').css('background-color', '')
}
In case you have defined a block with a custom key name in combination with the idx parameter, then the key name will be used in the function call.
Example: You use the following block definition:
blocks['myblock'] = {
  idx: 145
}
In the previous example the following function in custom.js will be called: function getStatus_myblock(block)
(and not function getStatus_145(block))
Example, Trigger on different text values:
function getStatus_14146(block){ // where 14146 is your block IDX
var idx = block.idx;
var device = block.device;
var tekst = device['Data'];
if(device['Data']=="No Data"){
block.addClass='none'
block.icon = 'far fa-thumbs-up'
}
// geen actie
else if (tekst.includes('geen waarschuwingen')){
block.addClass='none'
block.icon = 'far fa-thumbs-up'
block.title = 'Geen Melding'
}
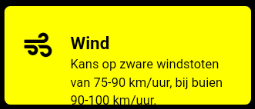
// zware windstoten
else if (tekst.includes('Kans op zware windstoten')){
block.addClass='warningyellow'
block.icon = 'fas fa-wind'
block.title = 'Wind'
}
}
function getChange_IDX(block)
This function gets called when the value of a Domoticz device changes. This function will only get called after updating the block. If you want to change the block definition as a result of the status you should use the getStatus function as described above.
Change value of another block
By calling Dashticz.setBlock from the getStatus function you can change another block as well. Example:
function getStatus_2(block) {
  var idx = block.idx;
  var device = block.device;
    console.log(device.Level)
    if (parseFloat(device.Level) === 0) {
        block.title='level 0';
        block.icon='fas fa-train';

        Dashticz.setBlock('mytitle', {
            title: 'also 0',
            icon: 'fas fa-train
            });
    }
    else {
        block.title='level is not 0 but ' + device.Level;
        block.icon="fas fa-bus";

        Dashticz.setBlock('mytitle', {
            title: 'not 0, but ' + device.Level,
            icon: 'fas fa-bus
            });
    }
}
The getChange_2 function gets called when the data of device with index 2 changes.
This previous example will also change a block that is defined by blocks['mytitle'] (for instance a blocktitle):
blocks['mytitle'] = {
    type: 'blocktitle',
    title: 'Default',
    icon: 'fas fa-car'
}
Device hook
On every device update the device hook is called first. You can use the device hook to manipulate device data before the update is send to the Dashticz blocks.
Example:
function deviceHook(device) {
    if (device.idx==43) {
        device.NettCalc = parseFloat(device.Usage) - parseFloat(device.UsageDeliv)
        device.deviceStatus = device.NettCalc >= 0 ? 'positive':'negative';
    }
}
The device parameter contains the device data as received from Domoticz. In the previous example the device field ‘NettCalc’ is calculated, which can be used in for instance a dial.
You can also call Domoticz.setBlock functions from the device hook.
You could do something similar in the getStatus functions, but then it’s required that a block is defined that uses that specific device.
For the device hook function that’s not necessary: It will be called on any device update received from Domoticz.
One special functionality is the device field deviceStatus. You can set this field to a certain CSS class name. This CSS class name will be applied to the Dashticz blocks that use this device.
You could set the value of deviceStatus based on the current device value or based on the value of another device.
Happy hacking :)