Frames
With a frame it’s possible to show (internet) content directly on the Dashticz dashboard.
A frame is defined as follows:
////////////////////// FRAMES ///////////////////////////
var frames = {}
frames.weather = {
  frameurl:"//forecast.io/embed/#lat=49.2624&lon=-123.1155&name=Vancouver&color=#00aaff&font=Helvetica&fontColor=#ffffff&units=si&text-color=#fff&",
  height: 250     //height of the block in pixels
}
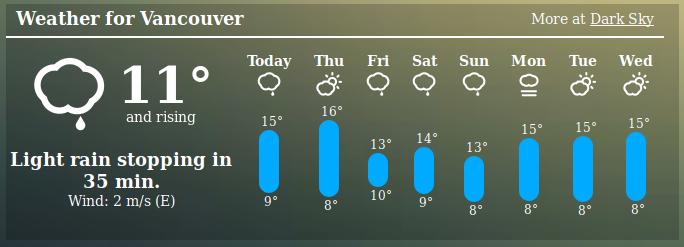
In the previous example the weather forecast for Vancouver from forecast.io is downloaded.
You can add a frame to a column in the usual way:
//Definition of columns
columns = {}

columns[1] = {
    blocks: [frames.weather],
    width: 6
}
Frame parameters
| Parameter | Description |
|---|---|
| frameurl | The URL to load in the frame |
| width | 1..12 The width of the frame relative to the column width. 12=100%, 3=25% |
| heigth | Height of the frame in pixels |
| scrollbars | false Scrollbars are never shown (even if they are needed) Default: auto |
| refresh | Refresh interval (in seconds) |
| forcerefresh | Control the caching-prevention mechanism of the frame content
0 : Normal caching behavior (=default)1, true : Prevent caching by adding t=<timestamp> parameter to the url. Not all websites will handle this correctly2 : The frame content is loaded via php, preventing caching. (php must be enabled on your Dashticz server) |
| scaletofit | Width of the frame content in pixels, which will be scaled to the block width.
256 : Assuming the width of the frame content is 256 pixels, then the frame will be scaled in such a way that the content will fit the block width. |
| aspectratio | The height of the block will be adjusted to a certain aspect ratio, taking scaling via scaletofit into account. |
Example
var config = {}
config['language'] = 'nl_NL'; //or: en_US, de_DE, fr_FR, hu_HU, it_IT, pt_PT, sv_SV
config['domoticz_ip'] = 'http://192.168.178.18:8080';   //Replace with your Domoticz IP:Portnumber
config['domoticz_refresh'] = '5';
config['dashticz_refresh'] = '60';

config['auto_swipe_back_after'] = '0';

//Definition of blocks
blocks = {}

blocks['weather'] = {
  frameurl:"//forecast.io/embed/#lat=49.2624&lon=-123.1155&name=Vancouver&color=#00aaff&font=Helvetica&fontColor=#ffffff&units=si&text-color=#fff&",
  height: 250
}

//Definition of columns
columns = {}

columns[1] = {
    blocks: ['weather'],
    width: 6
}

//Definition of screens
screens = {}
screens[1] = {
  columns: [1]
}
This will give the following result:
In some cases the frame content doesn’t fit well within the block width. The frame content can be scaled by using the block parameters scaletofit and aspectratio.
For instance, the buienradar widget has a frame width of 256 pixels, and an aspect ratio of 1:1. That means you can define the block as follows:
blocks['buien'] = {
  frameurl: 'https://gadgets.buienradar.nl/gadget/zoommap/?lat=52.37403&lng=4.88969&overname=2&zoom=11&naam=amsterdam&size=2&voor=0',
  scrollbars: false,
  width:12,
  scaletofit: 256,
  aspectratio: 1,
}
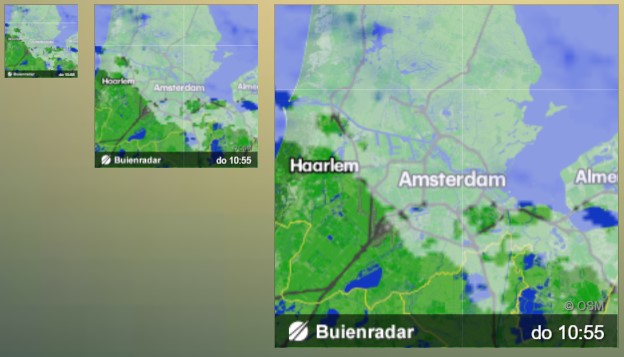
In the example above the ‘buien’ block has been added to columns of width 1,2 and 4 respectively.
For other buienradar widgets check the following url: https://www.buienradar.nl/overbuienradar/gratis-weerdata
Look for the iframe examples and copy/paste the content of the ‘src’ parameter to the frameurl of your Dashticz block.