Configuring a basic Dashticz Dashboard
If you followed the steps as described in Installation then you are prepared for creating your own Dashboard.
Step 1: Default Dashboard
Let’s start with a minimal config. Create the config file custom/CONFIG.js
with the following content:
var config = {}
config['language'] = 'nl_NL'; //or: en_US, de_DE, fr_FR, hu_HU, it_IT, pt_PT, sv_SV
config['domoticz_ip'] = 'http://192.168.1.3:8084';
config['domoticz_refresh'] = '5';
config['dashticz_refresh'] = '60';
Replace the domoticz_ip config setting with the ip-address of your Domoticz server.
This should give a result like this:
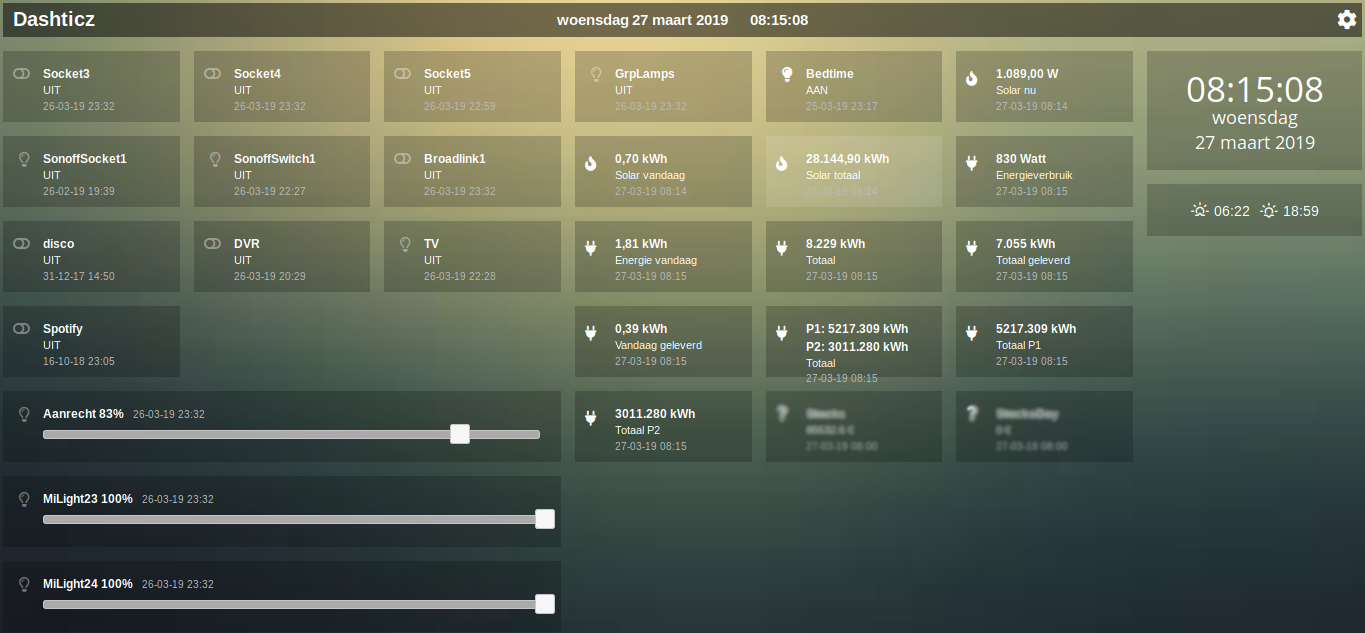
In your situation Dashticz might show less devices, depending of course on how many devices you have defined in Domoticz. Further, with the default settings Dashticz only shows the Domoticz devices that are being used in Domoticz and marked as favorite.
If you don’t see any device then probably your Domoticz connection is not working.
Troubleshooting
Check your Domoticz IP address and port number
If you’ve configured a Domoticz username/password then add the following settings to
CONFIG.js
config['user_name'] = '<Domoticz Username>';
config['pass_word'] = '<Domoticz Password>';
If your initial dashboard is working then let’s continue with step 2.
Step 2: Creating a custom layout
In this example we’ll create a simple dashboard, consisting of
one screen.
two columns, consisting of 1/3 and 2/3 of the screen width.
two devices in the second column next to each other.
First we have to add the block definition for the devices. For this you have to know the Domoticz device ID. You can find your device ID in the Settings->Devices overview of Domoticz. Choose two switch devices. In this example we’ll use device id 120 and 121.
Add the following to CONFIG.js:
//Definition of blocks
blocks = {}
blocks[120] = {
  width: 6
}

blocks[121] = {
  width: 6
}
This means we want to use device id 120 and device id 121. We give them width of 6.
- Explanation of width
For setting the width of blocks (and columns) the grid system is used. The total available width is 12. If you set the width of a block to 6 then 50% of the column width will be used for the block width.
So in the previous example both blocks will have a width of 50% of the column we will place them in, meaning they will fit into one row.
Next, we add the column definitions to CONFIG.js:
//Definition of columns
columns = {}
columns[1] = {
  //In this example: No blocks are defined in this column
  //This column will be empty
  width: 4
}
columns[2] = {
  blocks : [120, 121],
  width: 8
}
In this example we’ve defined two columns. The first one will have width 4 (33% screen width. The second one has width 8, meaning 67% of screen width).
In column 2 we place device 120, as defined by blocks[120] and device 121, as defined by blocks[121]
As the last step the screens need to be defined:
//Definition of screens
screens = {}
screens[1] = {
  columns: [1, 2]
}
One screen has been defined, consisting of column 1 and column 2.
Just to be sure, add the following CONFIG settings as well:
config['use_favorites'] = 0;  //Request all Domoticz Devices, not only favorites
config['auto_positioning'] = 0;  // Use 0 this if you have defined your own columns
Your complete CONFIG.js now should look as follows:
var config = {}
config['language'] = 'nl_NL'; //or: en_US, de_DE, fr_FR, hu_HU, it_IT, pt_PT, sv_SV
config['domoticz_ip'] = 'http://192.168.178.18:8080';
config['domoticz_refresh'] = '5';
config['dashticz_refresh'] = '60';

config['use_favorites'] = 0; //Request all Domoticz Devices, not only favorites
config['auto_positioning'] = 0; // Use 0 this if you have defined your own columns

//Definition of blocks
blocks = {}
blocks[120] = {
  width: 6
}

blocks[121] = {
  width: 6
}

//Definition of columns
columns = {}
columns[1] = {
  //In this example: No blocks are defined in this column
  //This column will be empty
  width: 4
}
columns[2] = {
  blocks : [120, 121],
  width: 8
}

//Definition of screens
screens = {}
screens[1] = {
  columns: [1, 2]
}
This should give the following result:

Retrieve status of a device
You can get the status of a specific device with: http://192.168.1.3:8084/json.htm?type=command¶m=getdevices&rid=IDX
Replace 192.168.1.3 with the IP Address (and Port number) for your Domoticz!
IDX = id of your device (This number can be found in the Domoticz’ devices tab in the column “IDX”)
Easy method
The Easy Method is only recommended in case Dashticz is not exposed to the public internet.
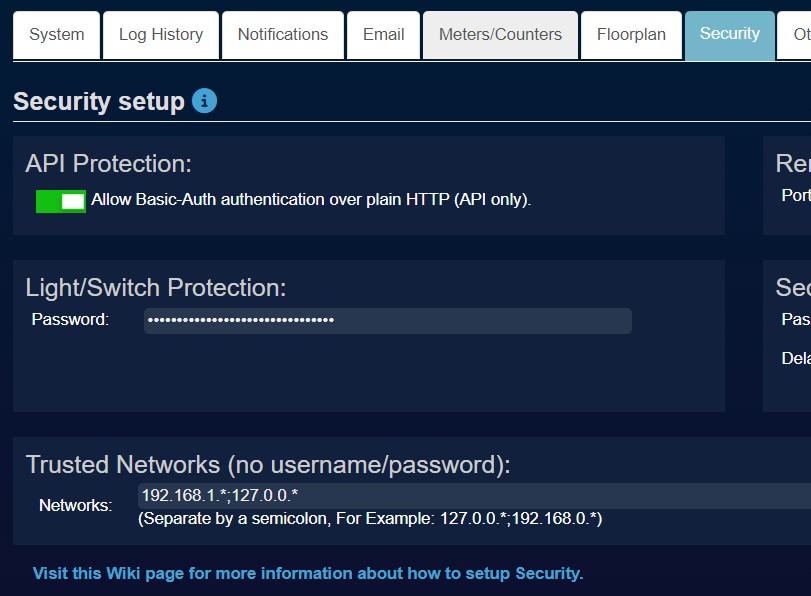
In Domoticz->Settings->Security tab:
Tick ‘Allow Basic-Auth authentication over plain HTTP’ in Domoticz->Settings->Security->API protection
Fill in your local subnet in Trusted Networks
You can add a basic level of user access control by defining a user in Domoticz, and configure Dashticz with the corresponding user credentials:
In CONFIG.js add the Domoticz username and password,
config['user_name'] = 'admin';
config['pass_word'] = 'domoticz';
Note
To receive instant Domoticz device updates it’s necessary to have your Dashticz device IP (or local subnet) is in the Domoticz Trusted Network setting. This is a limitation of the current Domoticz versions.
Example of Domoticz settings:
Advanced method
Since Domoticz 2023.2 authorization via OAuth2 is supported.
OAuth2 is only supported on https. That means that both Dashticz and Domoticz need to be served from an https address.
Further, the following configurations steps are needed.
In Domoticz create a new user.
In Domoticz - Setup - More Options - Application, create a new application. Example:
Enabled: true
Is Public: false
Application Name: Dashticz (or something else)
Application secret: DashticzPassword (or something else)
In Dashticz CONFIG.js:
Remove CONFIG[‘user_name’] and CONFIG[‘pass_word’]
Add the following
CONFIG[‘client_id’] = ‘Dashticz’; CONFIG[‘client_secret’] = ‘DashticzPassword’;
If you have configured Domoticz and Dashticz as described above, then when you open Dashticz the Domoticz authentication window will be shown, where you can fill in a Domoticz username and password. After verifying the user credentials a token will be generated which will be used by Dashticz to get data from Domoticz.
The advantage of the OAuth2 flow is that you don’t have to provide user info in CONFIG.js. (With the client_id and client_secret info only, it’s not possible to retrieve data from Domoticz)